Introduction to Snipping Tool:
Microsoft Corporation has introduced a new application called 'Snipping Tool' in its latest version of Windows i.e. Windows Vista. Snipping Tool lets you take screen shots of your Windows applications or a certain part of the screen. Windows users can now use this powerful application to take screenshots instead of using the old method- Alt-PrintScreen or simply Printscreen.
How to start Snipping Tool:
Please follow these steps to start the Snipping Tool:
1. Click the Start button  on the Windows Taskbar.
2. Click 'All Programs'.
3. Now click 'Accessories' folder from the menu.
4. From programs that appear click 'Snipping Tool'. The program will now start.
Snipping Tool will be added to Quick Launch Bar when you run the Snipping Tool for the first time.
How to use Snipping Tool:
The program looks like this:
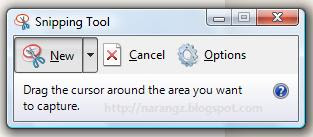
The Snipping Tool provides the user with many options to take the screen shots. You can get these snipping options by clicking the small arrow alongside the 'New' button. Following are the snipping options:
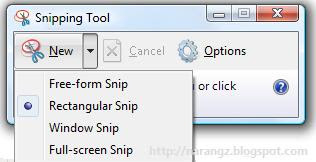
1. Free-form Snip- This option lets you draw a shape of your choice to take a screen shot. Once the user has drawn the shape & leaves the mouse button the snip is created.

2. Rectangular Snip- As the name suggests, this option lets you create a rectangular selection. Once the rectangle is drawn the snip is created of the area.

3. Window Snip- This option lets you take a snip or a screen shot of an entire window. All the contents of that window will be captured in this snip.

4. Full-screen Snip- This option lets you capture the entire screen area.

Snipping Tool Options:
To change the Snipping Tool options or preferences click on the 'Options' button.

A new window will appear

These options do the following:
1. Hide instruction text- This hides the instruction text, if selected.
2. Always copy snips to the Clipboard- If enabled, it copies all the snips to the Clipboard so that you can paste it in any image editing application and edit as per your requirements.
3. Include URL below snips(HTML only)- If enabled, this option lets you add the link(URL) of address of the website you are viewing in Internet Explorer if saved in MHT/Single file HTML file format.
4. Prompt to save snips before exiting- If enabled, the snipping tool will prompt you to save the snips before exiting.
5. Display icon in Quick Launch bar- If enabled, the Snipping Tool will be displayed in the Quick Launch bar.
6. Show screen overlay when Snipping Tool is active- When enabled the Snipping Tool interface will be hidden while creating a snip.
7. Ink color- Lets you choose the colour of border of the snip.
8. Show selection ink after snips are captured- If enabled, it displays a border in the selected colour on the snip.
Saving Formats:
The Snipping Tool lets you save the snip or screen shot in various file formats. You can save the snips in PNG, GIF, JPEG, MHT file formats.
Tools:
Highlighter Tool:
It lets you highlight certain parts of the snip.

Pen Tool:
It lets you draw and annotate in the snip. You can choose the desired colour of the pen and even customise the tip & thickness of the pen.

Send Snip Tool-
It lets you send the snip as an embedded image or as an attachment.
Eraser Tool-
It erases anything which was drawn by the pen tool or highlighted by the highlighter tool.
The Final Word:
Pros:
The Snipping Tool is the first of its kind in the history of Windows. Its now easier to take screen shots of any area of the screen without pressing the Alt-PrintScreen combination without any need of third party application. It comes free with Windows Vista.
Cons:
It doesn't provide any option to add text to the snip. The only way you can add text is by using the pen tool or by editing the snip in an image editor. Microsoft should provide this option in the future through updates.
Conclusion:
The Snipping Tool is a boon for the those who want to share the snips with others to discuss things or just for the sake of fun & that too without spending on third party applications!
Surprise the users with new tools every now and then, Microsoft!
Author- Rajbir Singh
Licensed Under- Creative Commons Attribution-Noncommercial-No Derivative Works 2.5 India License
Subscribe to:
Posts (Atom)
